Do you need to find out about straightforward and inexpensive DIY succulents? Succulents have gotten widespread not solely of their...
I not too long ago found air dry clay and all of the enjoyable issues you may make with it – like this lovable DIY clay planter. My plant propagation obsession is getting out of hand, and I’m working out of pots and planters to deal with all of them! (take a look at how I not too long ago rooted Three fig timber from off cuts) I’ve about 20 mini succulents that have to be planted, so I made a decision to take a crack at it and make my very own air dry clay pot. The consequence was this lovable little boho rustic clay planter, and I’m going to point out you precisely the right way to make your individual!

OK I would like to start out this tutorial by stating that I AM NOT A PROFESSIONAL CERAMICIST. I’m effectively conscious that my approach could possibly be 100% unsuitable, however DIY’s are all about having enjoyable proper? RIGHT?! I had tons of enjoyable studying the right way to make this DIY clay succulent planter. Typically you simply have to study as you go. Its one of many causes I really like DIY a lot. I study one thing new each challenge! Now hopefully with this air dry clay pot tutorial you’ll study one thing too (and make a couple of much less errors than I did). Get pleasure from!
Guys I’ll be trustworthy – I STRUGGLED my means via this DIY challenge. Should you’ve by no means labored with clay (like me) it may be difficult at first. I actually needed it to have a boho vibe and I actually needed to provide him a bit of face. So I first tried to make my clay pot in a the ‘pinch pot’ type – however I HATED it. It was bumpy and had ugly creases throughout it, no bueno. The perfectionist in me was simply not having it. So I scratched that concept and began from sq. one. Right here is the right way to make a DIY clay planter with air dry clay.
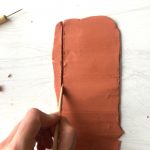
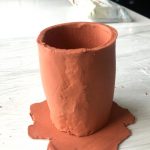
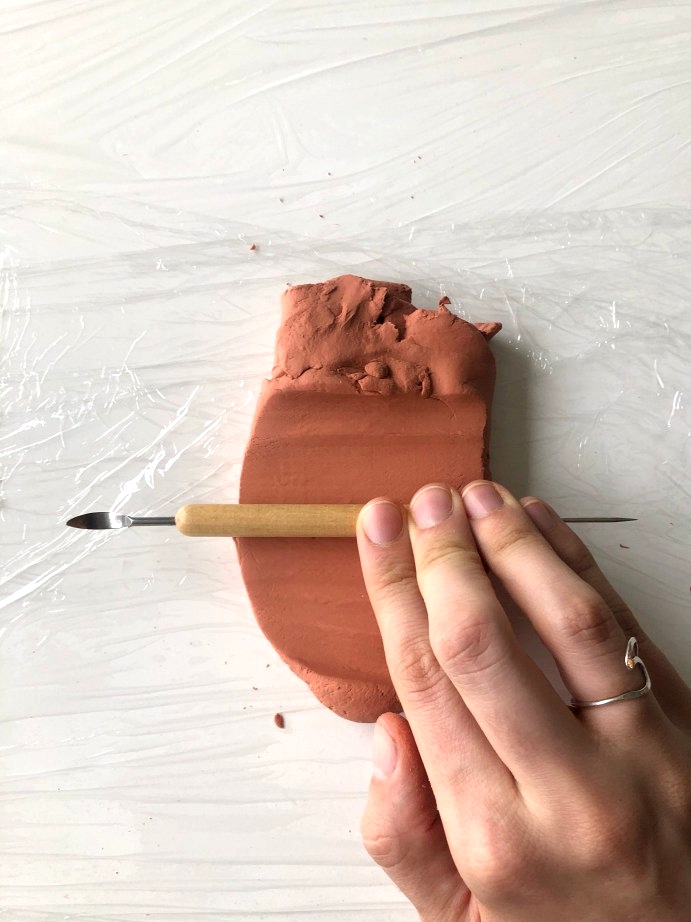
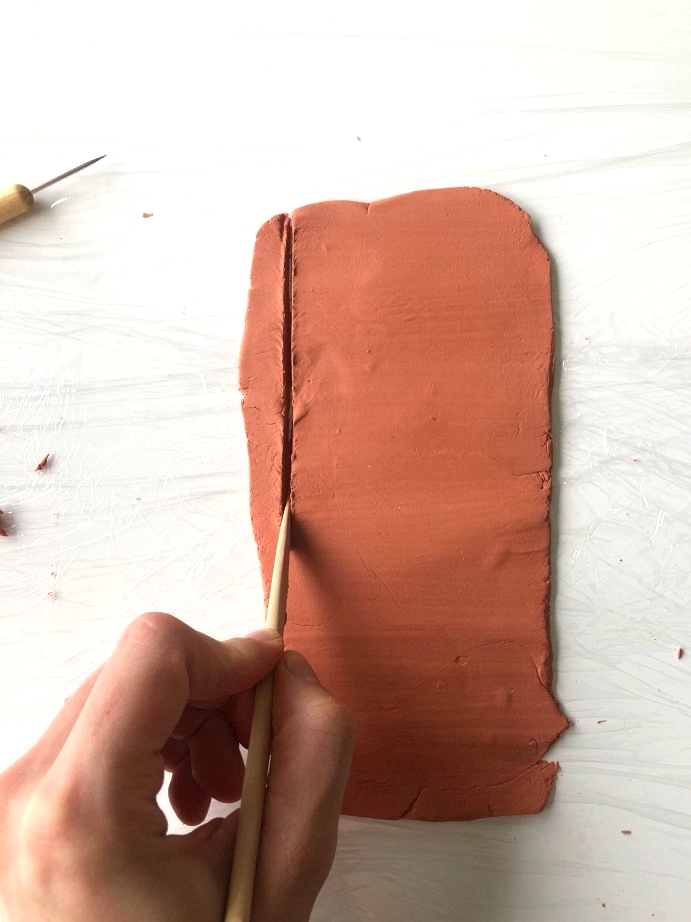
Take a ball of air dry clay and roll it out till its flat. Should you don’t have a rolling pin you should utilize a water bottle – or a clay device like I did. You’ll then lower the clay into a good rectangle.
Professional Tip: Air dry clay dries SUPER quick. Duh. Don’t dilly dally, you’ll have to work quick earlier than your clay turns into crusty. If it dries to quick you possibly can spritz it down with water, however don’t use an excessive amount of. It will possibly trigger it to crack when it dries.
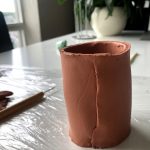
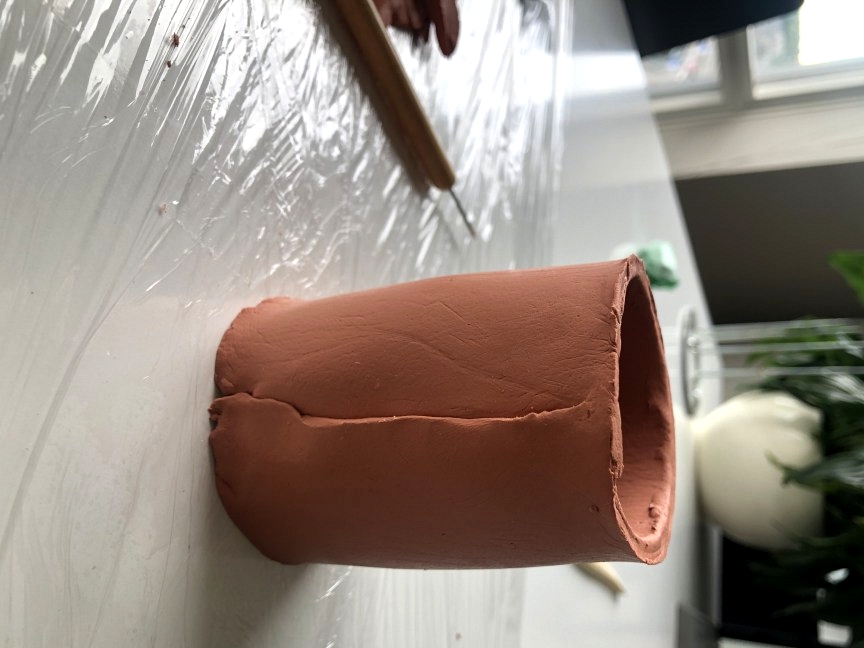
Be a part of two ends of your rectangle to type a cylinder. Attempt to easy the joint as finest you possibly can utilizing your ceramic instruments. After your clay cylinder is joined, roll out a smaller part of clay till its flat – this can turn into the underside of your pot. Place the clay cylinder on prime of the flat clay and trim the perimeters away. Easy to complete. I made my first rectangle too massive, I simply lower it down at this level.
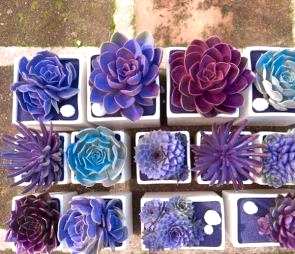
Should you’re a loopy plant woman (like me) it’s worthwhile to see these IKEA hacks for blissful crops
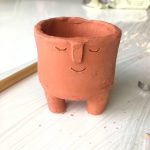
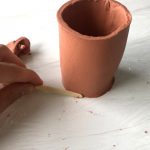
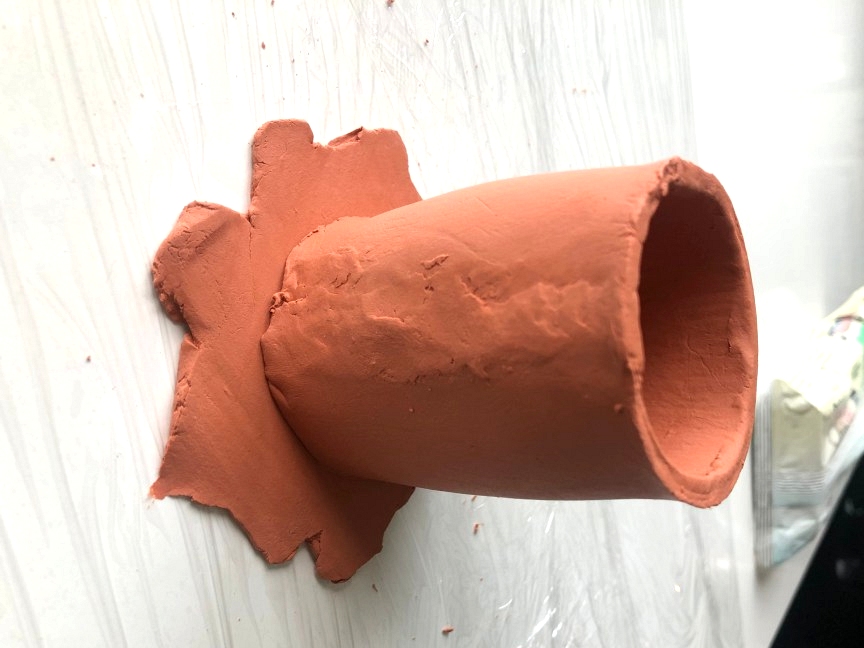
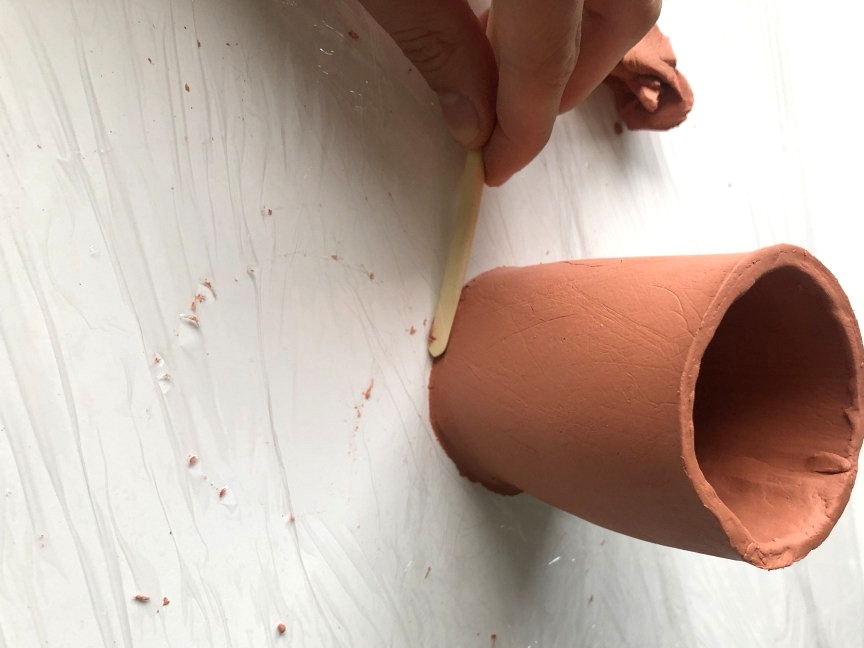
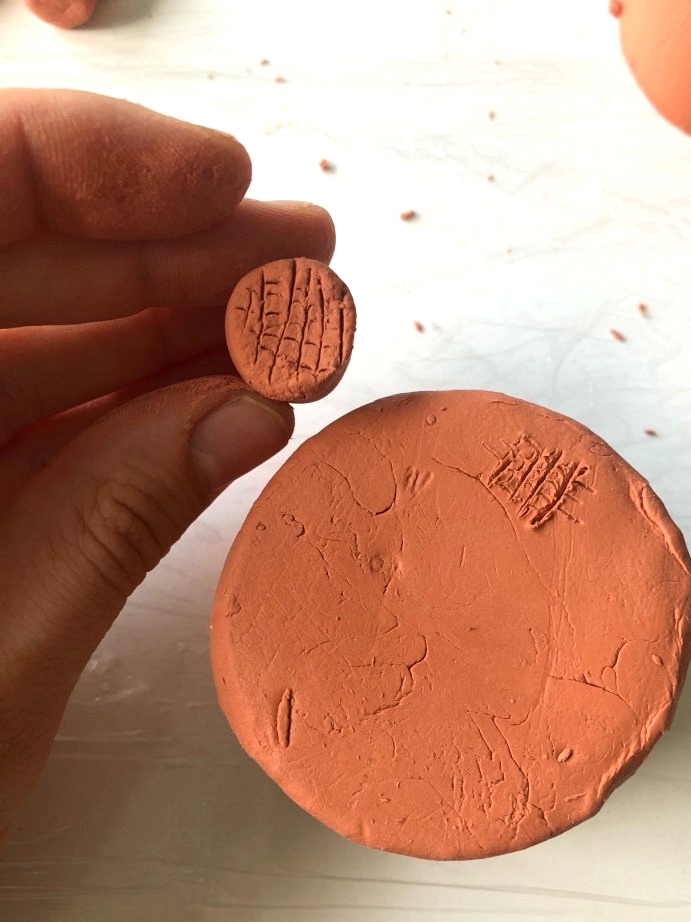
Make three ft in no matter type you want, I made mine in a cone (ish) form. Connect the ft to the physique by slicing into the clay in a cross hatch sample, ceramic fanatic name this scoring. There’s some terminology you should utilize at your subsequent ceremonial dinner (you’re welcome). I discovered smoothing the foot joint was actually tough as all the clay pot is de facto fragile at this level. Attempt to be gentile throughout this step!
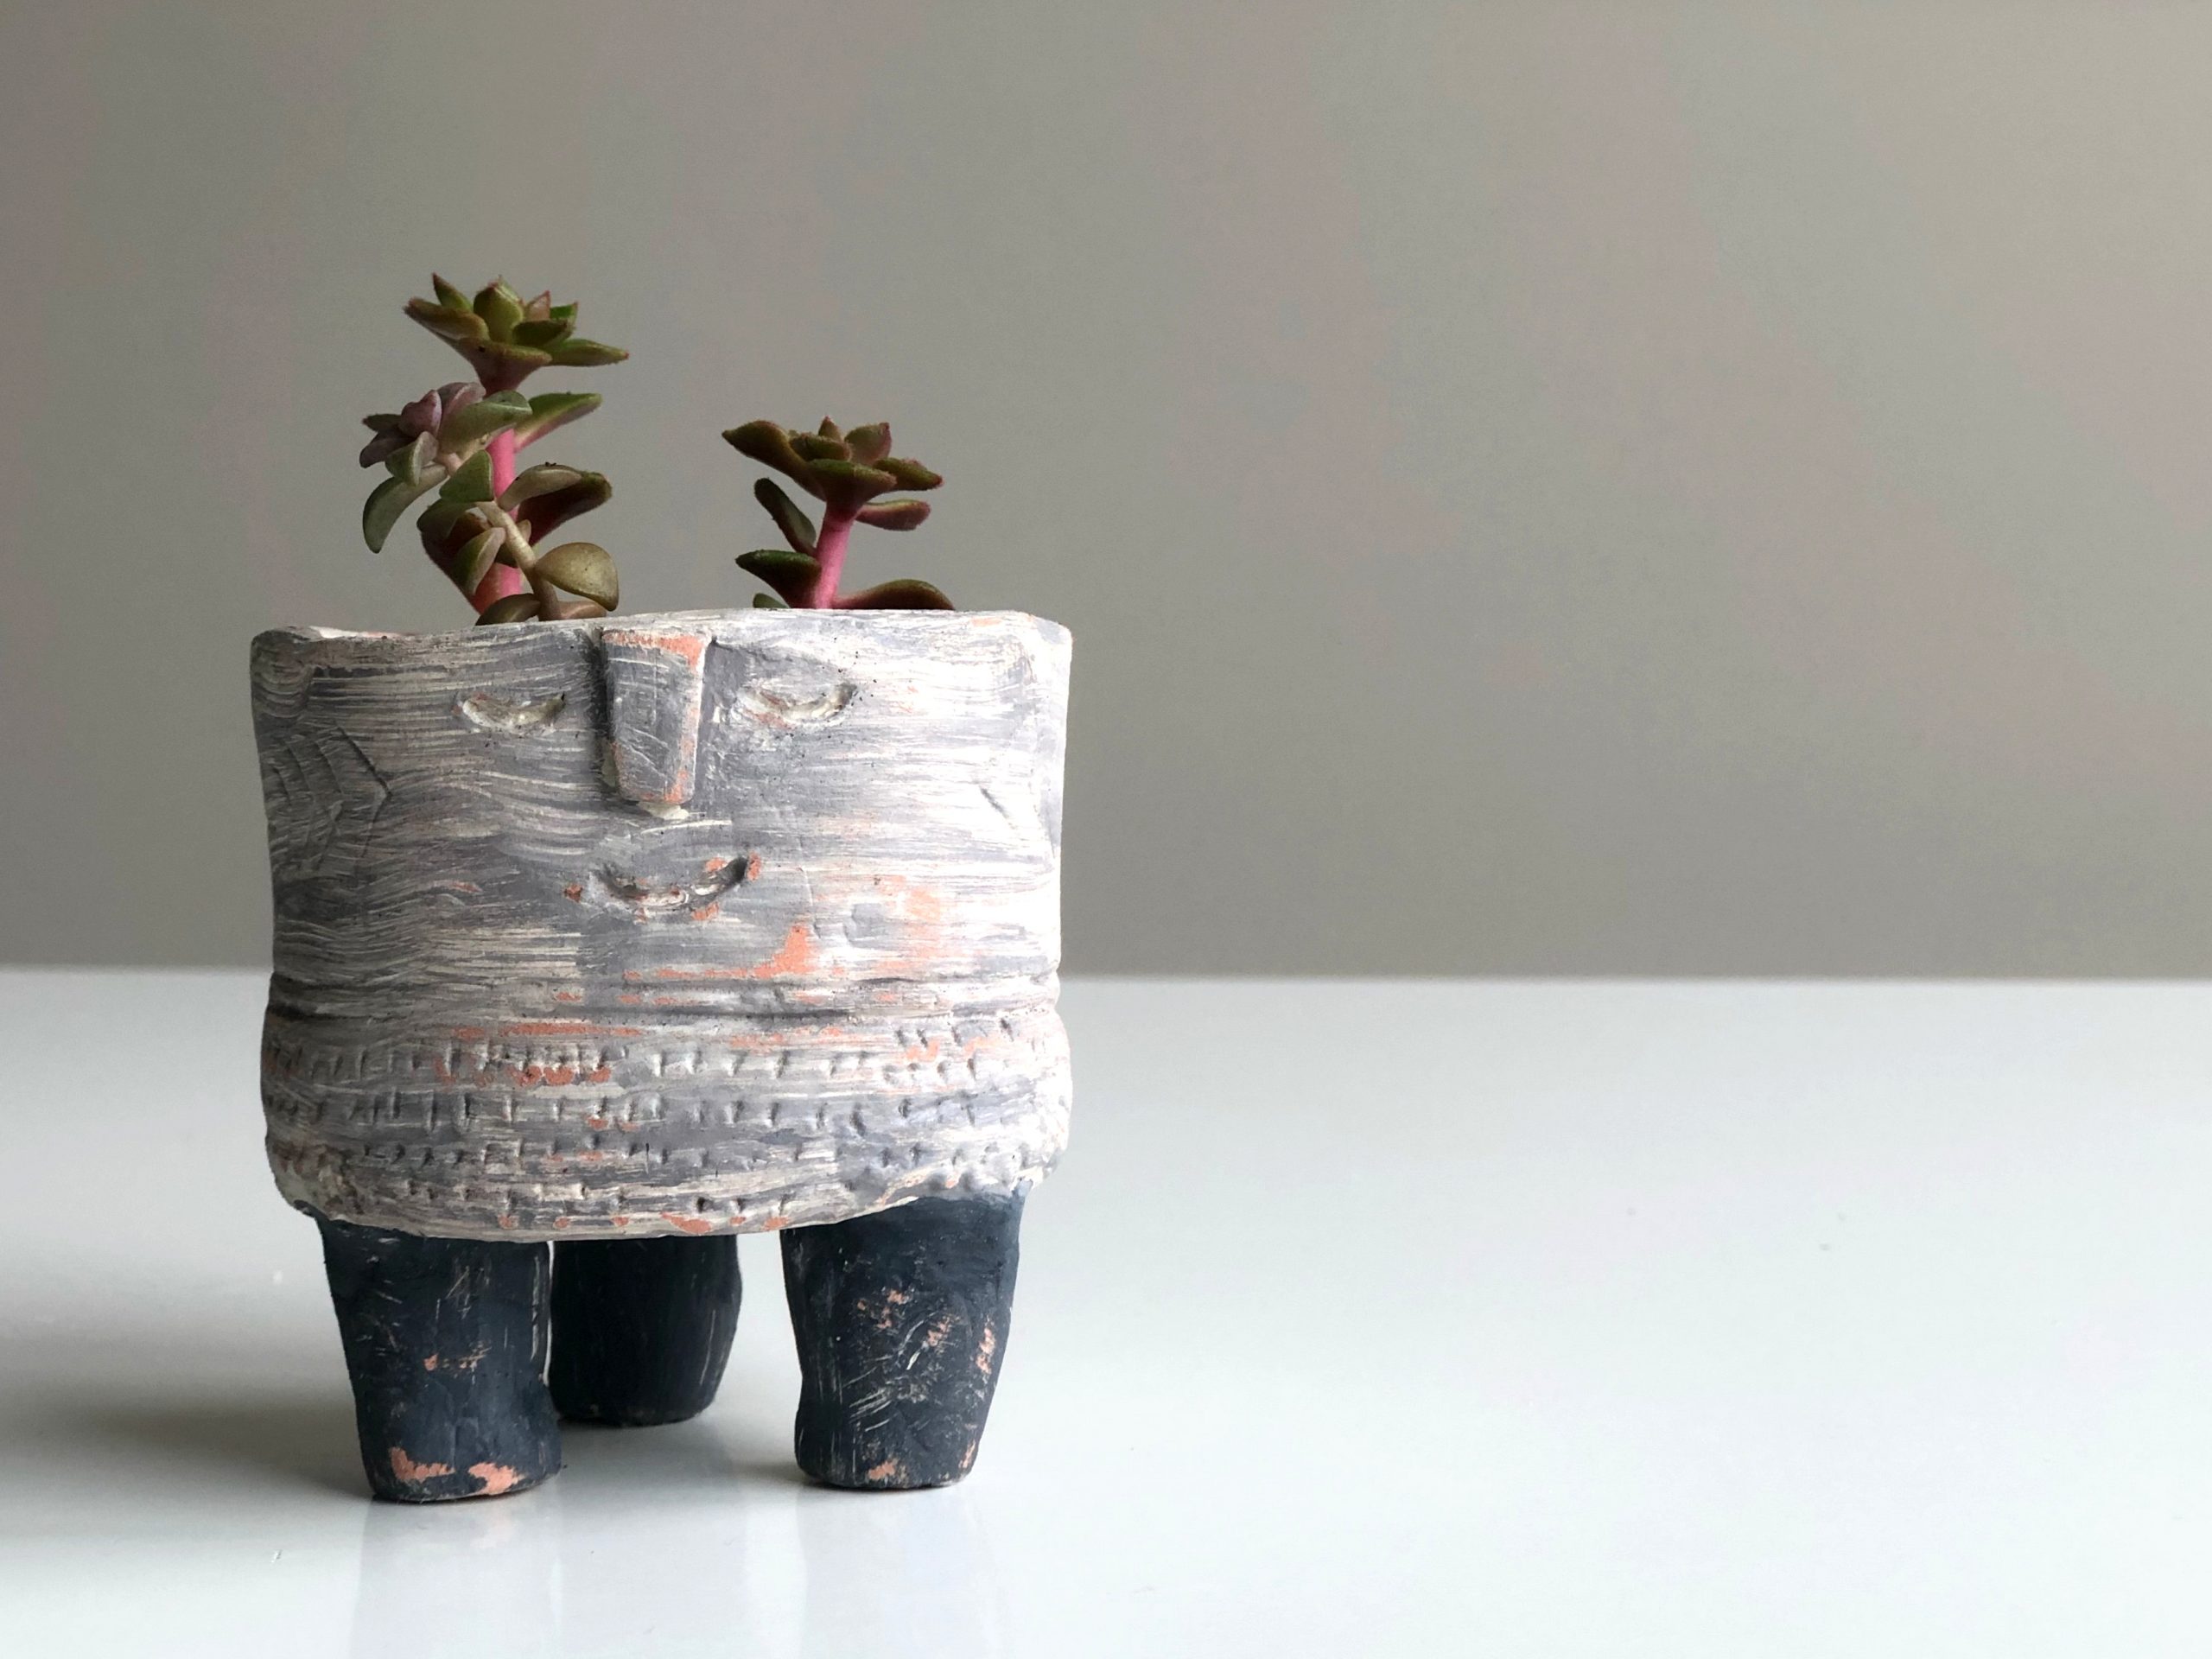
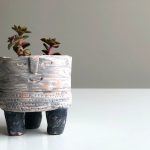
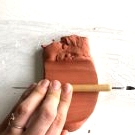
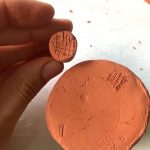
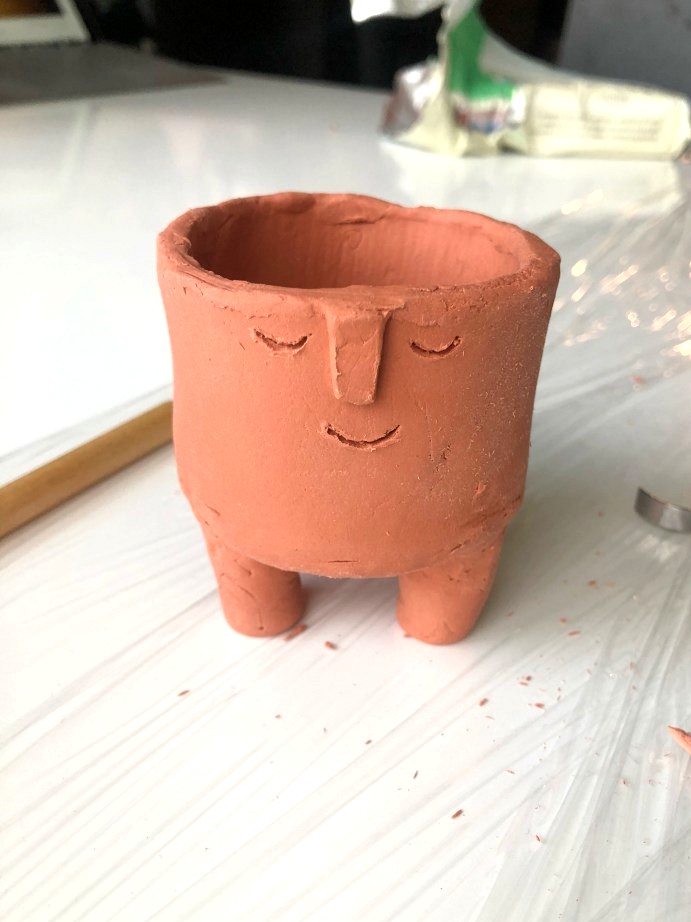
And now for my favourite half, carving the face! I carved a cute smiling boho face, however be at liberty to carve any expression you need in your succulent planter! As soon as your glad along with your carving you possibly can let it dry for 1-2 days.
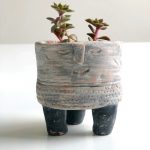
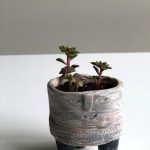
Time to color your DIY clay pot! I knew from the start I would want to color my succulent planter simply to make sure it might be waterproof, I did purchase my air dry clay from the greenback retailer in any case. Should you’re confidant in your clay and also you just like the pure shade, be at liberty to cease right here! In case your clay pot has a tough texture I’d counsel giving it a fast sand with some advantageous sandpaper. I had a couple of tough areas that I needed to be smoothed out and sandpaper completely did the trick! When selecting your paint I extremely counsel utilizing one thing waterproof. One thing that can seal the clay and ensure watering gained’t trigger it to deteriorate. Paint your DIY clay succulent planter in any type you need! I ended up with a gray wash look. After the paint dried I went again over it with the sand paper once more to tough it up and provides it a extra rustic look. I’m glad I did. Now he appears like a bit of boho vintage pot!
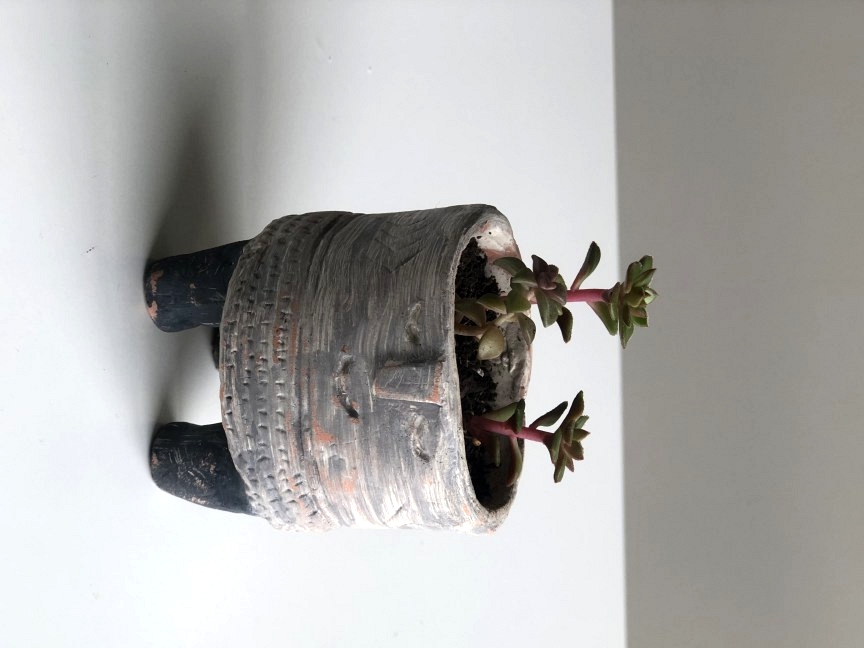
I’m tremendous proud of how he turned out. Who thinks I ought to make him a bit of buddy?